Blog
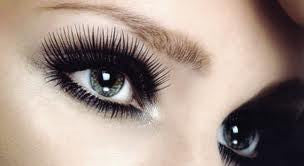
Eyes- Create the smokey eye
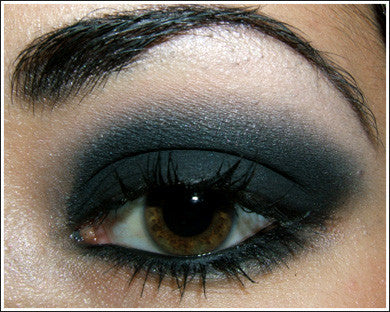
Of course start with a clean face. Prep your skin with eye cream and moisturizer. Give them a few minutes to sink in.
Concealer is a huge deal when trying to pull off a dramatic eye. The natural darkness around your eyes will make your overall makeup look sloppy. Conceal above and below your eyes, paying special attention to the inner and outer corners (this is where darkness lurks!)
- Liner
- Smudge it up!
- Highlight to make it pop
4 . Medium Shadow for depth
This is the step many people miss. A medium shadow, something in the same color family as your lid color, but lighter, should be used in the crease. You’re trying to create depth without leaving any obvious lines. It’s important to overlap the dark and medium shades where they meet. Use the same medium tone to blend the outer portion of your lower lid.
And voila you’re done!
Don’t think black is the only way to go...Smoke up purple, blue, or green liners and shadows with the same technique. This is also a great way to incorporate your uniform colors ;)
Easy Tips for Wearing Red Lipstick
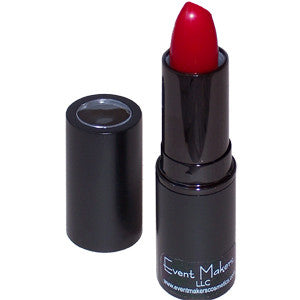
1.Consider the lighting. "If you're going to be outdoors, pick a softer or sheerer shade," says Rachel Lockhart, owner of Rachel's Makeup Studio, in Boston. "For evening, go bolder, so your features stand out."
2.Avoid deep reds if you have thin lips. They tend to make lips look smaller.
3.Experiment with intense shades if you have strong coloring. "Natural contrast gives you more options," says Jill Morton, head of ColorCom, a consultation agency in Honolulu, says of those with exaggerated natural coloring (for example, paper-white skin, black hair, and blue eyes).
4.Don't play up your eyes. "Pair red lipstick with the lightest possible eye makeup," says lipstick designer Poppy King. A little mascara and beige shadow will do.
5.Don't toss a red lipstick in a shade that doesn't work. "Top it with a gold gloss to warm and soften it, or add a pink gloss to take it to the bluer side," says makeup artist Maria Verel.
6.Coordinate your look. Dot a little smudge of the lipstick on the apples of your cheeks, then blend it with your fingers.
7.Be precise. That means whether you're using a brush or applying lipstick straight from the tube. "Red lipstick should never be applied casually in the back of a taxi," says Verel.
8.Don't use red lip liner. If it doesn't match your lipstick perfectly (and odds are it won't), you'll end up with a two-tone effect. If you like using liner, find a shade that's close to your natural lip color and use it to outline your lips.
9.Prevent "bleeding." Apply a little concealer around the border of your mouth.
10.Avoid getting lipstick on your teeth. After applying, put your finger in your mouth, purse your lips around it, then slowly pull it out to remove excess color.
GO BOLD or GO HOME!
As Cheer Season Begins
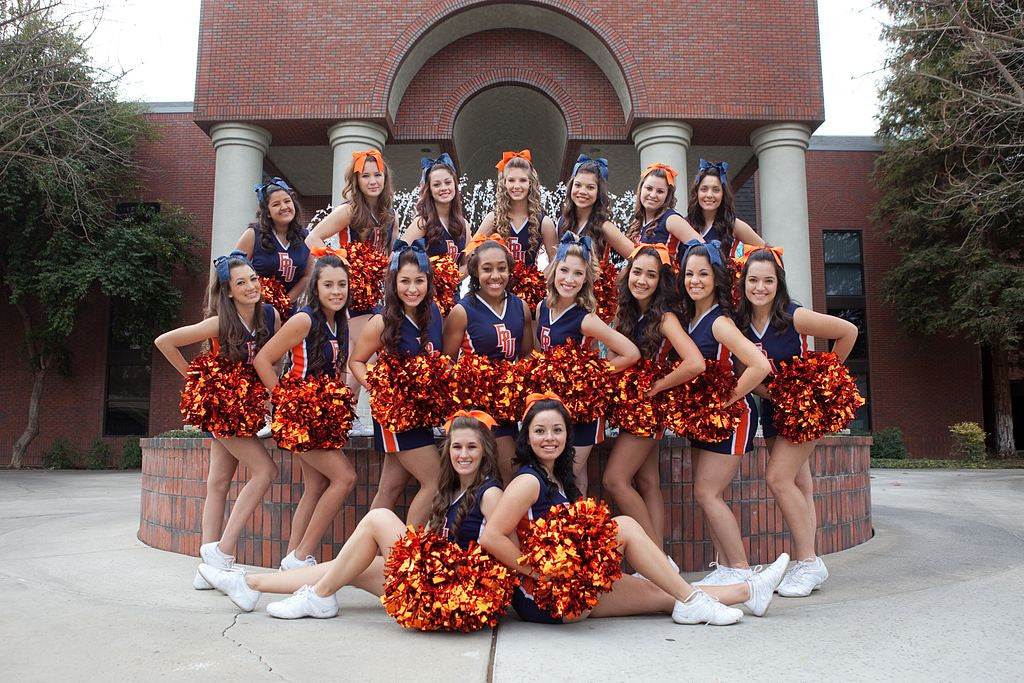
And the season starts again...(whew that was fast!) Teams are putting together stunt groups, choreography, and their "look". Choosing team makeup kits (both on the floor and the track) is a bit more difficult than looking for and applying make up for day to day wear. Many regular daily wear cosmetic options are also not suitable to be worn while cheering. Here are a few things to consider while choosing your performance cosmetics:
LONG LASTING: Nothing is less attractive than a cheerleader with make up running down her face! Choose make up that provides decent coverage, is sweat proof, and that won’t cog your pores.
BOLD: As you are quite a distance from the crowd, your make up needs to be bold enough to be seen from a long way’s away.
FRESH: Though your make up does need to be bold to be visible, do not mistake this for applying thicker, heavier make up. This will only age you or make you appear clownish, gaudy or tacky.
Cheerleading make up is all about choosing the right make up colors that will work with your features and skin tone, and then applying them correctly so that your features are highlighted appropriately. Here are some techniques you can use to help accentuate your features while cheering for the team:
EYES: The important thing to remember about your eyes is that they should always have mascara and eye liner applied, regardless of whether or not you do choose to apply eye shadow. Applying eye liner to the upper and lower eye lid will allow for your eyes to be visible from a distance and give your eyes depth. Applying 1-2 coats of mascara will enhance that depth and make your eyes really stand out.
LIPS: You must never neglect your lips! You can choose to apply a bold shade of lipstick and liner to help draw attention to them, or you can also apply a stunning gloss that will catch the competition floor, stadium or gymnasium lights. Neglecting to put anything on your lips will cause you to have a washed out or “faded” appearance.
CHEEKS: Many girls make the mistake of brushing on a far darker shade of blush to their cheeks before performing in front of a crowd. If you do choose to wear a darker shade, choose a blush that is only a shade or two darker than what you would usually wear. You can also enhance your cheeks with a light dusting of shimmer or bronzer for a more natural, fresh look.
Above all you are a team...all makeup should coordinate and present as a uniformed group. Nail your routine and get Style Points too!
Wheww...It's Hot!
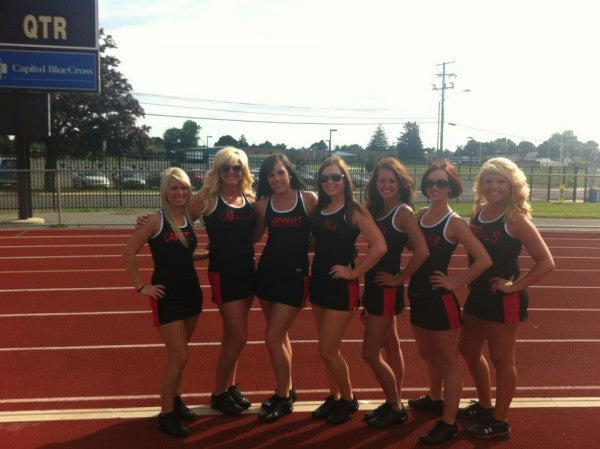
We know firsthand how to deal with the makeup vs. heat dilemma (did I mention my squad is in prime performance season...pic attached). We have learned a few tricks of the trade over the years! Since we are cheering our butts off right along with you I wanted to share a few tips to consider:
For full performance make up face:
-- PRIME! This is a deal breaker. Priming will hold foundation nicely in place and can be found in the cosmetic section of any local Target, ect.
For casual everyday or camp:
--Mix your foundation with moisturizer and make your own tinted moisturizer! Mix equal parts in the palm of your hand and blend –blend- blend. You can even add some skin boosting serum. This version is light and will keep your skin feeling great (no meltdown necessary)
--If you really need coverage only put it where you need it that way you won’t feel like your makeup is melting off. mix your foundation with a bit of primer and add it to the trouble spots.
Send us your Cheer Camp pictures for our Facebook page!...there might be a contest coming up :)
HOW TO CLEAN YOUR MAKE UP BRUSHES – IT’S EASY!
-Every single brush your your collection (blush, face, foundation, eye shadow, lip liner, eye liner, kabuki and etc)
-A foaming face wash (we used a Dove one)
-Warm water & the bathroom sink for about 20 minutes
-Old-ish towels
4 Easy Steps to clean makeup brushes:
-Dampen the bristles of the makeup brush with warm water.
-Add a small amount of face wash to the brush bristles and lather up.
-Rinse the bristles of the brush under running water until the water turns clear. Inspect the face brushes thoroughly. If your brush is extra dirty like mine, keep following step 2 & 3 until there are no clumps visible.
-When all brushes are clean, run the bristles across the towel then lay them flat across the towel to air dry. Do not dry them standing up.
Easy!
*Make sure you don’t dampen the whole make up brush or leave brushes soaking in water. It will loosen the glue keeping the bristles in the brush over time.
We've Got Spirit!
Many team use this as a fundraiser as well. Order in bulk and sell at your spirit stand/school store/cheer gym
Custom Tattoos sizes and prices:
1,000 1.5" X 1.5" $270.00
1,000 2" X 2" $330.00
10,000 1.5" X 1.5" $550.00
Email sales@eventmakerscosmetics.com to place you order with artwork attached.
Pro Eyelash Tips & Tricks
Curling lashes gives eyes the appearance of being wider and brighter. Shoot warm air from your blowdryer on the mascara curler for 3-5 seconds to warm it up before curling lashes. Touch it first to make sure it's not too hot. It's a myth that you have to curl lashes before you apply mascara. You can curl lashes after mascara application, just make sure the mascara is dry first.
Zig-zag the Mascara Wand:
Zig-zagging the wand back and forth during application helps cut down clumps.
Apply to Top Lashes Only:
Many makeup artists recommend applying mascara only to the top lashes (I abide by this rule). If you want to make eyes appear wider, apply mascara to the bottom lashes but make sure you give lashes a light touch. Not great at getting those bottom lashes? Try putting a tissue under them before application.
Use a Mascara Primer:
Primers coat lashes and separate them before you apply mascara. Makeup artists swear by mascara primer. I tried it and like it, but because it's an added step, I usually use primer only on special occasion when I spend more time on my makeup.
What it Means to "Apply a 2nd Coat" of Mascara:
I was always confused by magazine's directives to coat eyelashes with "no more than 3 coats of mascara." It seems magazines have been giving these directions since I was a pre-teen and likely before. What they mean is to apply the coats of mascara all at once before the first coat dries. Once the first coat dries, you'll get clumps if you attempt another swipe at the lashes.
Thou Shalt Not Pump Wand In & Out of Tube:
This only introduces air into the tube, which will cause your mascara to dry out sooner than it should.
Bend the Wand:
A top makeup artist once gave his secret to his steady hand: he always bends his wand at a right angle.
With these simple tricks you will be batting perfect lashes in no time!
Make applying lash strips easy + foolproof
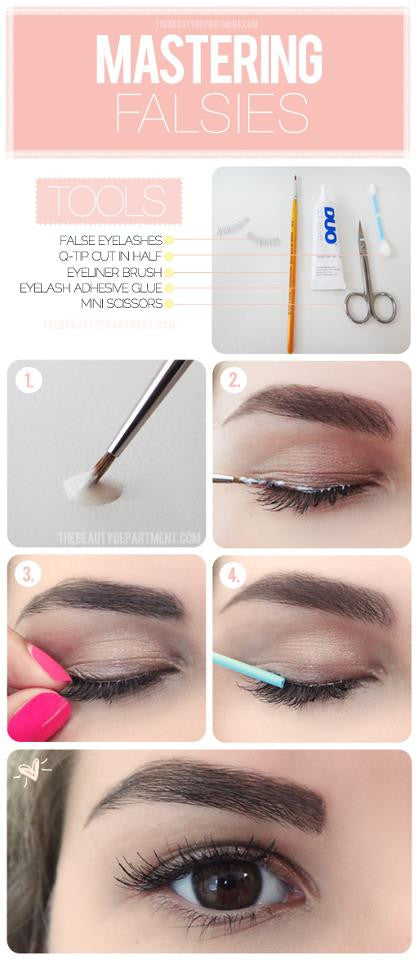
This tutorial was too perfect from the beauty department...had to share!